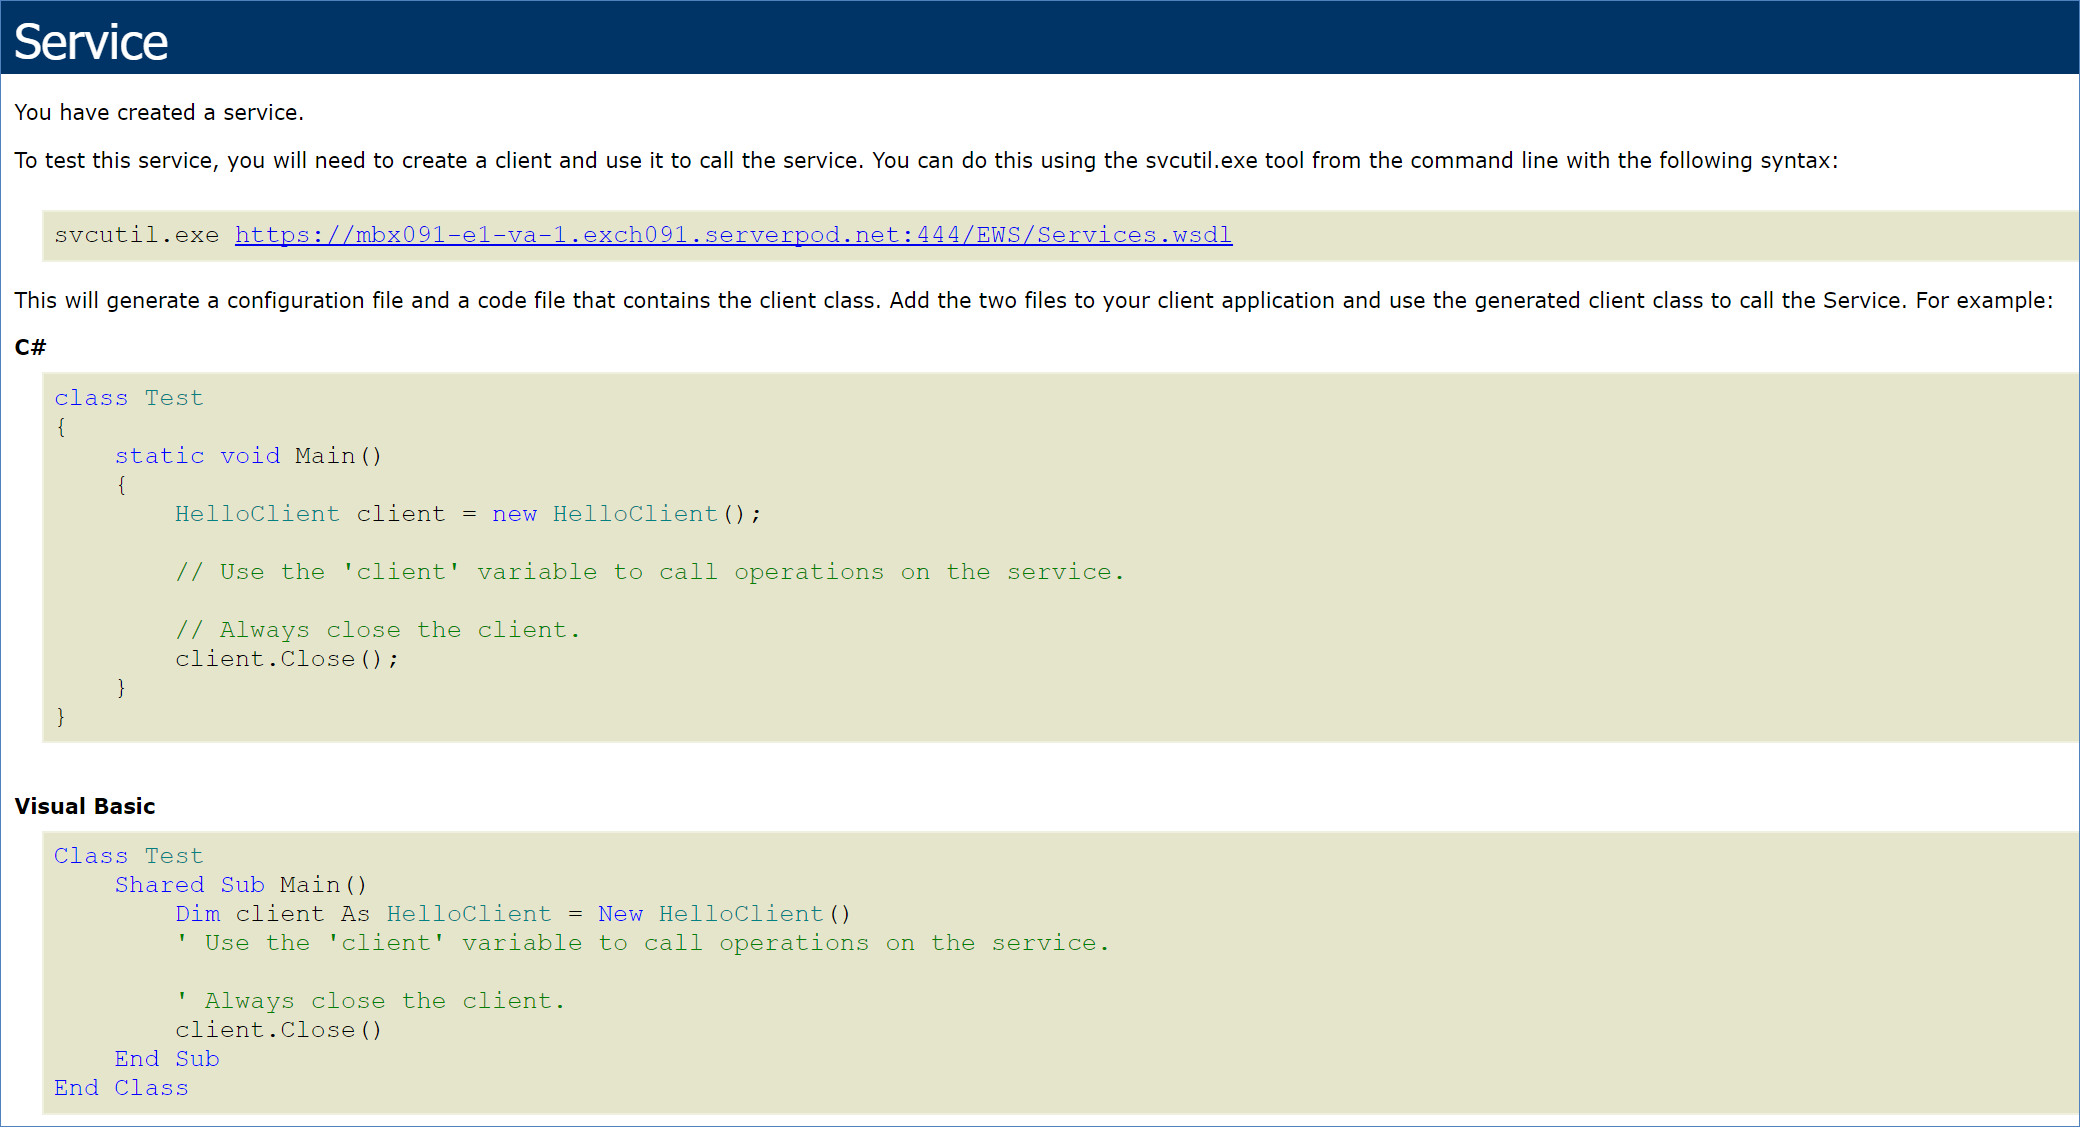
Microsoft Exchange ESA
This topic will help you understand the capabilities of the Exchange synchronization (Exchange ESA) and how to set up and manage synchronization between the systems.
Prerequisites
The Exchange ESA integration of Agiloft works with MS Exchange 2013 and above for the Windows domain using Exchange Web Services (EWS). You need to grant an impersonation role to the Exchange user for this domain.
Adding an Exchange ESA Sync in Agiloft
The steps in this section require you to alternate between your Agiloft instance and MS Exchange, so open each one in a separate browser window or tab.
In MS Exchange
- Obtain the details of the Exchange user with the impersonation role, who can access and perform actions over other mailboxes in the server. Some public Exchange servers require a full email (user@domain.com) as the user name here.
Check the Exchange host by navigating to
https://[Exchange Host]/EWS/exchange.asmx.This will require you to enter your Exchange user credentials.
In Agiloft
- In
Agiloft, click the Setup gear in the top-right corner, go to Sync, and then select New > External Sync to open the External Sync wizard. Choose these settings, and configure the others as you like:
- In the General tab, enter a name, and select Microsoft Exchange as the External System Type.
- In Conflicts, select External System should take precedence.
- Click Next to navigate to the ESA Settings tab.
- Enter the address of the Exchange Host, the full name of the impersonation user, the account password, and the user domain name. Refer to Exchange ESA Impersonation for guidance if you don't have this information already.
Select Yes for Collect all user's contacts.
Exchange Web Services (EWS) doesn't provide access to Global Address Lists, and Agiloft needs a single and consistent list of contacts, so the first step in synchronization is for the system to collect all the contacts into the Contact folder of the user with the impersonation role. These contacts are retrieved based on matching emails. Any contacts who aren't in the folder of the impersonation user and don't have an email address won't be synced, since the email is used as a key field. However, contacts without email addresses who are in the user folder will be synced if the field mapping is done correctly. For instance, if the DisplayName is matched to a Full Name, and Full Name is used as a second identifying column.- Select the entities to sync. Exchange can sync Exchange users (with mailboxes), those users' contacts, and their calendar events.
- Click Next. The system automatically tests the connection. If it passes, it opens the Mapping tab. If it fails, the error message provides some guidance on remedying the problem.
Add Mappings
- In the Mapping tab, select the external structure mappings for the defined Exchange attributes such as users, contacts, and calendar events.
- Calendar will match to events.
- Either Person or Employee will match to users.
- Note: If you want to use the Calendar synchronization, it is better to use the People table than the Employees sub-table because the Agiloft calendar is linked to the People table.
- External User will match to contacts.
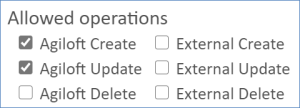
- For each entity, click Edit Mapping to set up the field matching. Note that due to EWS restrictions, you can only perform People operations on
Agiloft and not the other way around.
- We can use the following field mappings for the Person details:
- Alias to Login
- CompanyName to Company
- GivenName to First Name
- MailBoxAddress to Email (identifying)
- Manager to Manager Name
- Surname to Last Name
- We can use the following field mappings for the Contacts/External Users details:
- Alias to Login
- CompanyName to Company
- DisplayName to Full Name (identifying, but not changeable at both ends)
- EmailAddress1 to Email (identifying)
- GivenName to First Name
- Manager to Manager Name
Surname to Last Name
Note: It is advisable to deselect the flag "Use strict match for identification". Setting it for strict match would prevent the sync of contacts that have no email address.
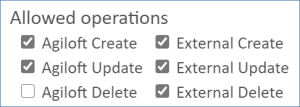
- The calendar synchronization works in both directions, apart from deletions that work only from
Agiloft to Exchange due to Exchange restrictions.
Sync Events
We can use the following field mappings for the Calendar/Events:
- Duration to Duration
- Start to Start Time
- Subject to Description
- ReminderMinutesBeforeStart to Notification Time
It is important to note that calendar events will sync to the Owner calendar. This mapping is set as the event owner in the Relation Mapping tab. This mapping is generally done automatically if the event Owner is the Agiloft event creator. However, if you as an admin create an event to someone else, the mapping field must be changed accordingly, otherwise the events will not be synced.

Event Recurrence
The following fields can also be mapped to specify event recurrence:
- IsRecurring to Recurrent - a choice field with No/Yes options.
- Recurrence Pattern to Recurrence Pattern - a choice field with Daily/Monthly/Weekly/Yearly options.
- RepeatAfter to Repeat After
- Weekdays to Weekdays - a multi-choice field with the available weekdays listed.
- EndEventType to End Event Type - a choice field with After Certain Date/After Number Of Events/No End Date options.
- EndDate to End Date - the end of the event occurrence, used if End Event Type = After Certain Date. Note that End is not the same as End Date - see below for more details.
- NoOfOccurrences to No of Occurrences
Note: The fields Start, Duration and End fields are used to set a formula where Start + Duration = End. Do not confuse End with End Date, or the formula will not have a result.
- For a Yearly occurrence, the Start is defined as Month/Day, with an interval of 1.
- For a Monthly occurrence, the Start is defined as DayOfMonth.
- For a Weekly occurrence, the Start is defined as DayOfWeek, if Weekdays does not have a value.
Add Relations
- Click Next to open the Relation Mapping tab.
- Set up the linked field relations with Exchange.
You can use the standard Calendar to Person table relations
- Person (Creator Name, Creator Login, Creator Team) for Event Owner relation. This relationship is required, since an Exchange Event cannot exist without an owner. Any calendar events from Agiloft must include the Event Owner person to be synchronized.
- Person (personalinv) for UserAttendees
- For the ContactAttendees relation, create a linked field similar to the Person (personalinv) from External Users to Calendar.
Finish and Save
Define the Run Mode, and then click Finish to save the sync.
Test the Exchange Synchronization
The following examples will perform some tests of the Exchange synchronization:
Sync Employees
- Navigate to the Employees table, and select Actions > Sync > Run <sync name>.
- This will create the Administrator and superimp users in the Agiloft People table.
- In Exchange, change the superimp user's name and re-run the sync.
- The user should be visible in the People table.
Sync Contacts
- Navigate to the External Users table and select Actions > Sync > Run <sync name>.
- This will result in contacts with matching emails being updated and some new contacts created.
Synchronization restrictions with users
It is not possible to retrieve the Last modified date and time of users through EWS, so Agiloft will sync all users whenever it's run.
Additionally, the functions Create / Update / Delete users are not supported using EWS.
Sync contacts not in the Contacts folder of the impersonation user
- In Exchange, log in as a user other than the impersonation role user, and create a new contact with an email address.
- Verify that the user doesn't exist in the impersonation user's Contacts folder.
- Run sync from the External Users table.
- The user will be created in Agiloft and they will be added to the Contacts folder of the user with the impersonation role.
Delete contacts
- In Agiloft, delete a contact from the External Users table.
- Run sync.
- The user will also be deleted in the Contacts folder of the user with the impersonation role.
Note: Agiloft will sync the delete operation with the Contacts folders of the impersonation user and not any other contact. So if another contact with the same email address exists in another user's contact folder, they will remain untouched.
Create and Update Calendar Events
- On the Calendar table Actions, run the sync.
- Check that the new events were added to the Agiloft calendar.
- In Agiloft, add an event that includes the admin user, and some other contacts. Sync the calendar.
- Check that the event was added to Exchange.
Note: if a contact does not exist in the user's contacts folder, they will be displayed as emails in the event attendees list.
Event synchronization restrictions
Please note that only the first 1000 events will be synchronized starting from a week ago to two months in the future.