Two-Factor Authentication
Two-Factor Authentication (2FA) requires users to verify their identity using both a password and a code sent to their mobile device in addition to their password. It provides an added layer of security, particularly for users with extensive permissions such as knowledgebase administrators.
If you use text messages to send 2FA codes, users must have a valid phone number associated with their user records. Non-US numbers should be preceded by + and then the country code.
Signing in with Two-Factor Authentication
When 2FA is set up in your system, you need your 2FA device handy when you log in.
- Navigate to the login page for your KB, enter your credentials, and click Log In.
- In the field, enter the code that was sent to you by text message, or the code that shows in your authenticator app for your Agiloft account.
- Click Submit to log in.
Initial Setup and Resetting a Key
These steps are necessary only the first time you log in after 2FA has been enabled, or if you lose your secret key by reinstalling the app or changing your device. The steps below use Google Authenticator as an illustration, but you can use any other third-party 2FA app as well.
- Navigate to the login page for your KB, enter your credentials, and click Log In.
- When the pop-up dialog appears, click Resend secret key. This sends the 16-digit key to your linked email.
- Open the email you received from your KB's outbound address. The body of the email is the 16-digit key.
- Open the authenticator app on your device. In the app, look for a plus sign or Add button to create a new entry.
- When prompted, select the option to enter a key, rather than scan a QR code.
- Name the account with the name of your KB, or some other name that will be clear to you.
- Enter the 16-digit key in the Key field.
- If your app has an option to select time-based or counter-based codes, make sure to select time-based.
- Tap Add, Save, or Finish, to save the account to the app.
Now, the app shows live-updating codes for each account you've configured. Navigate back to Agiloft and click Enter Code, then follow the Signing In steps above.
Enabling Two-Factor Authentication
You can enable two-factor authentication from a Knowledgebase or the admin console. Admin console access is only available for on-premise customers who maintain their own Agiloft server.
To enable 2FA:
In a specific Knowledgebase, log in as an admin, click the Setup gear in the top-right corner, and go to Access > Two Factor Authentication.
For all KBs on the server, log in to the admin console and go to General > Settings and click Two Factor Authentication.
If you don't see Two Factor Authentication, you likely need to upgrade to a later Agiloft release.
Select the Require two factor authentication checkbox.
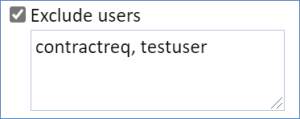
You can optionally Exclude groups or Exclude users from two-factor authentication. For instance, you might allow users with low permission levels to log in with only a password, while admin-level users must provide two forms of authentication. When excluding specific users from 2FA, enter the user’s Login. Use a comma to separate multiple logins.
Choose whether two-factor authentication is required For every login, or only For the first login from a particular device.
Optionally, if you chose to require it for the first login only, choose an expiration period after which users must reauthenticate.
- In Authentication Method, choose the method to send the authentication codes:
- Text message (SMS) sends codes directly to a mobile phone number. This messages requires that you have SMS set up in your KB already.
- Google Authenticator requires the user to have access to an authenticator app on a mobile device, although they can use other third-party authenticator apps besides Google. If you select this method, but you choose to send the initial code by SMS text message, you also must have SMS set up in your KB already.
- If you select the Text message (SMS) authentication method, or if you chose to send the initial Google Authenticator code by SMS, select the SMS account you want to use to send the codes.
- If you selected an SMS account, choose whether to use an Alphanumeric Sender ID for the messages. An Alphanumeric Sender ID is used instead of a phone number to serve as the sender for the authentication codes, and is required in some countries. If you select the Use Alphanumeric Sender ID checkbox:
- Enter the ID you want to use. Note that some countries require you to pre-register your Alphanumeric Sender ID before you begin using it. Make sure to check the requirements for any countries you operate in.
- Select the countries in the list where you want to use the Alphanumeric Sender ID. Hold Ctrl to select more than one. If you accidentally select a country that doesn't support Alphanumeric Sender ID, the system automatically uses the phone number instead.
Two-factor authentication uses cookies, which are both browser and device-specific. Logging in from a different device, a different browser on the same device, or after clearing cookies from the browser cache will prompt the user for reauthentication.