LDAP Access
Before configuring LDAP with Agiloft, keep in mind a few basic points:
- LDAP stands for Lightweight Directory Access Protocol, which provides a central repository of user information, passwords, and other data.
- Configuring LDAP with Agiloft requires you to create a mapping between standard or custom LDAP attributes and Agiloft fields in the Employee table, including group and team membership, to allow synchronized logins.
- Successful integration with LDAP typically requires additions to your LDAP database.
LDAP can hold any kind of data, but it is usually used to provide a central repository of user information and passwords. This allows other enterprise applications to check passwords against a single LDAP repository, rather than each application storing them individually. This reduces maintenance costs and improves security.
Using LDAP with other Data
In addition to login names and passwords, Agiloft allows other information such as email addresses, groups, teams, and custom fields to be mapped between LDAP attributes and their equivalents in Agiloft. However, the use of LDAP for more than login and password information provides some challenges for Agiloft.
Finding Custom Attributes
Both LDAP and Agiloft may contain custom attributes, or fields. Unfortunately, there is no way to find all the custom attributes in an LDAP database, except by reading the users one-by-one and noting their attributes. For LDAP databases with hundreds of thousands of users, this could take hours.
Agiloft resolves this problem by searching the first 1,000 users for attributes and referencing one specific user that contains the additional attributes that must be mapped. The actual values of the attributes in this user do not matter; they just need to exist. For example, if the user has a Telephone Number attribute of 0, the system adds Telephone Number to the list of mappable attributes.
Sending Email
Workflow rules that send email to a team need to know which users are part of which teams. Agiloft can instantly search its own tables with an SQL query to find all the matching users, but there is no way to perform an equivalent search on the LDAP database. Instead, the system would need to read every LDAP user in turn to determine whether they were a member of a given team. For large LDAP repositories, this could take a very long time.
To resolve this, when a user logs into Agiloft using LDAP authentication, the system creates a dummy entry for them in the Agiloft People table. The system then syncs with LDAP to refresh the cached data in this entry each time the user subsequently logs in. This allows the system to rapidly find team members and avoid unnecessary calls to the LDAP server. Of course, password information is not cached, so centralized password control is maintained.
This strategy allows Agiloft to automatically restrict team emails to those LDAP users who actually use Agiloft. If you want all users to receive email, you can configure the system to automatically sync with LDAP at regular intervals. However, some administrators see the restriction as an advantage because users who do not use Agiloft may not expect to receive email from it.
LDAP Integration
LDAP can be used by Agiloft in three ways:
- Synchronization: Agiloft imports LDAP users automatically at a specified interval or manually using the GUI. LDAP users become Agiloft users even if they have never logged in to Agiloft.
- Login authentication: LDAP is queried for a specific user when they attempt to log in to Agiloft.
- Single Sign-on (SSO): Using a special hyperlink and an ActiveX control, LDAP is queried with a user's domain login credentials so that they can access Agiloft without an explicit login. Agiloft uses the standard LDAP v2 protocol to connect and query an LDAP/AD server via simple bind authentication. The system does not add any proprietary extensions. To enable LDAP SSO, go to Setup > Access > Single Sign-On.
LDAP Wizard
LDAP configuration is completed with the LDAP wizard. To access the wizard, click the Setup gear in the top-right corner and go to Access > LDAP/AD Authentication.
Server and Connection
Follow these steps to begin configuring LDAP with your system:
- On the Servers tab, click Add Server or continue with the existing server. New servers are always added with the same temporary name and default port. Once a server is selected, these settings can be changed on the Server tab.

- On the LDAP tab, choose the server type. Use LDAP for non-Microsoft servers.
Complete the settings on the Server tab:
Enter the name of your company's LDAP server, port, and the base directory. The standard LDAP TCP port is 389, and the standard LDAP SSL port is 636.
These are common schemes for base directories:
- Domain: "dc=mycompany, dc=com" specifies each domain component of mycompany.com, in order. Subdomains are automatically synchronized as long as the account has delegated control to subdomain directory objects.
- Geographical: "c=US" specifies the country.
- If you're using a Microsoft Active Directory server, enter the Microsoft NetBIOS name or the domain name of the server in the Doman field.
- On the Login tab, enter the login and password for the LDAP server, as well as the connection type. Internal LDAP servers usually use the Non-Secure connection type.
Data and Mapping
Once you're connected to the server, you can begin specifying the data and mapping settings:
On the Object Class Field tab, select the object class that stores user authentication data, as well as the object classes that represent groups and teams. Multiple user authentication classes can be selected by holding the CTRL key. Notice that several new tabs appear when you move to the Object Class Field tab.
Object classes separate LDAP attributes into logical categories. The "user" class is often used for entries that have the appropriate user authentication attributes. If you want to restrict Agiloft logins to certain users, you could add a custom objectClass such as "EWusers" to these users and specify it here.
- Set the mapping settings on the Field Mapping tab:
- Select the user attribute that's mapped to Agiloft teams. LDAP provides no easy method for finding all attributes in use, so Agiloft scans all attributes in the first 1000 records. If the specified attribute contains an Agiloft team name, the user is added to that team. This is not a nested or recursive search. The specified attribute in the user record must directly contain the Agiloft team name for it to be mapped.
- Select the Primary Team for LDAP users.
Specify mappings between system fields and a corresponding LDAP attribute. Fields in the Employees table are populated by LDAP attributes according to these mappings. It's a good idea to add custom LDAP attributes to your user entries for this purpose. In particular, make sure you do not map directly to a linked field; if you need to sync with a linked field, create an intermediary field with a rule to keep the two in step, and then sync to the intermediary field. These are some common mappings:
Agiloft
LDAP Login
cn First Name
givenName Last Name
sn (surname) Full Name
name Email
mail - If desired, select a user in Agiloft that contains any additional user attributes not stored in LDAP. This setting controls where the system looks to get user fields that are not covered by the previous mapping.
- Set the mapping settings on the Group Mapping tab, which allows LDAP groups to be granted group privileges in
Agiloft:
- Choose whether LDAP attributes are mapped to Agiloft groups every time a user logs in to the system. If you chose not to map the data at every log in, user records are created with the default group selected in the next option when LDAP synchronizes for the first time. After the first synchronization, you could then edit group membership in an Agiloft user record at any time and LDAP would never overwrite the values.
- Select a default Agiloft group. Users who are not in an appropriate LDAP group are added to the default group. This setting also affects the Primary Team field.
- If desired, enter filtering criteria and click Refresh Group List to see the mapping between Agiloft and LDAP groups.
- Set the mapping settings on the Team Mapping tab. The options are the same as the Group Mapping tab. Note that choosing a default team also affects a user's Primary Team.
Server and Synchronization Options
After configuring the mapping between Agiloft and LDAP, set the remaining options for the LDAP server and its synchronization:
- Configure the following settings on the Options tab:
- Select whether to sync all users or only those that meet an LDAP search filter.
- Select whether the current LDAP server is the primary server. If so, select whether changes to users in Agiloft are propagated back to the LDAP server.
- Select whether groups are automatically created in Agiloft for each group found in LDAP. If so, select whether the groups are automatically deleted once they are no longer found in LDAP and have not had any permissions assigned to them.
- On the Synchronization tab, choose when and how
Agiloft synchronizes with LDAP:
- Select whether LDAP users are automatically imported into
Agiloft. If you choose to automatically import users, user records are created in
Agiloft for all LDAP users immediately, even if they never log in to
Agiloft. Otherwise, the system creates a user record for them when they log in, or when a manual sync occurs.
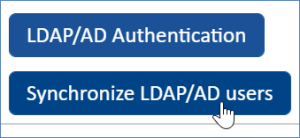
To manually sync LDAP users with Agiloft, go to Setup > Access and click Synchronize LDAP/AD users after completing the LDAP configuration.
- Select the frequency with which LDAP syncs with Agiloft. For manual syncs, select Never.
If syncs occur automatically, select the start time of the sync.
Click Finish to complete the LDAP configuration.
- Select whether LDAP users are automatically imported into
Agiloft. If you choose to automatically import users, user records are created in
Agiloft for all LDAP users immediately, even if they never log in to
Agiloft. Otherwise, the system creates a user record for them when they log in, or when a manual sync occurs.
Troubleshooting LDAP Sync
If an LDAP sync through Agiloft does not return a particular entity or attribute, first make sure you aren't attempting to sync with a linked field. If you need to sync to a linked field, you can create an intermediary field and sync to that, and then set up a rule that keeps the linked field and the intermediary field in step with each other.
If that isn't the issue, download a third-party LDAP client and use it to test the same base DN and query filter. If the entity or attribute returns through a third-party client but not through Agiloft, report the incident to Agiloft support for further investigation.
If the entity or attribute is not returned through a third-party client or Agiloft, the LDAP user specified on the Login tab of the LDAP wizard probably lacks the necessary permissions to view it. The user must have view access to all records you want to synchronize or authenticate against.
The problem might otherwise be caused by an incorrect filter in the LDAP query.